Back to jointjs.com.
Introduction
Integrating Rappid with Salesforce Lightning framework is quick and easy. In this tutorial we’ll take advantage of Lightning container, which works by embedding an app into an iframe. Then we’ll install and use lightning-container library to set up a basic communication between the Lightning and our app.
Embedding app into Lightning
The prerequisite is a working application (written in plain JavaScript or built with a framework).
The Lightning framework introduces couple of security measures which need to be met:
- No inline scripts (all scripts need to be placed in separate files)
- Strict MIME type checking enabled
- Assets need to be referenced by a relative path (e.g ./images/example.jpg)
Create a .zip file and place all your project files there (do not nest them in a folder).
Next we’ll go to the Lightning website and upload our project as a static resource and create some code.
Uploading static resource
Log in into your Salesforce account, go to the setup page (the icon in the upper right corner), and search for static in Quick Find input. Navigate to Static Resources tab. Click the New button and upload .zip file containing your app. Let’s name it "myApp":

Now it’s time to create a new Lightning tab which will host our app.
Go to the Developer console (click on the same setup icon in the right upper corner) and create a new Lightning component.
File > New > Lightning Component
Name it "myApp" and check the Lightning Tab checkbox:
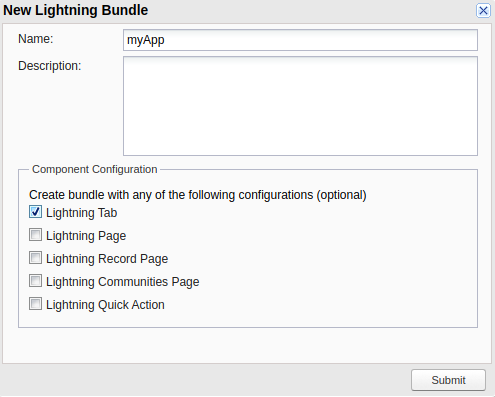
Click submit.
This will create a file named myApp.cmp.
   <aura:component implements="force:appHostable" >

   </aura:component>
As we can see, it’s an aura component which implements a force:appHostable interface. This interface will allow our app to be added as a Lightning tab inside the Lightning app.
Add Lightning container to this file:
    <aura:component implements="force:appHostable">
        <lightning:container src="{!$Resource.myApp + '/index.html'}" />
    </aura:component>
And we’re almost done! Last thing is to configure our tab. To do that, navigate to setup and search for tab in Quick Find input. Select Tabs and click on New button in the Lightning Component Tabs.
Choose our component from the Lightning Component dropdown and add additional info. You should end up with something like this:
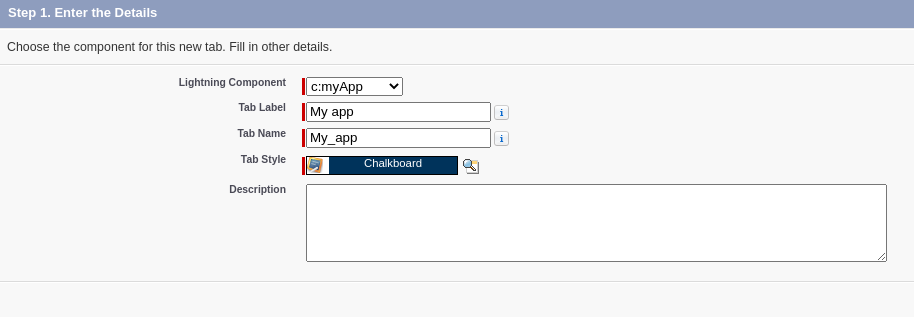
Click next and on the second step click save.
Now it’s possible to add this custom tab in an existing Lightning app.
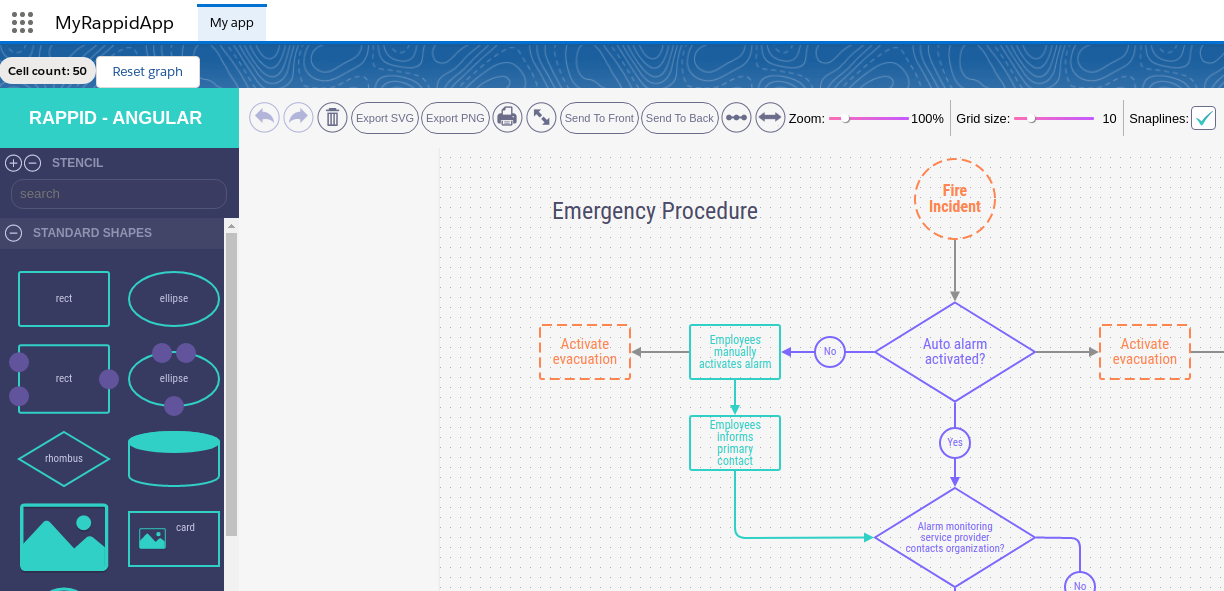
Basic communication
In this section, we’ll add a counter, which shows number of cells in the graph and a button to clear the graph.
First we need to get lightning-container library and install it in our application.
Once installed, we’ll setup a very simple communication:
- listen to graph
addandremoveevents and callsendMessagemethod - add event listener with
addMessageHandlerthat will reset the graph
    import LCC from 'lightning-container';

    // Lightning communicating with our app
    LCC.addMessageHandler(message => {
        const name = msg.name;

        if (name === 'reset') {
            graph.getCells().forEach(cell => cell.remove());
        }
    });

    // App communicating with Lightning
    graph.on('add remove', () => {
        const count = graph.getCells().length;
        LCC.sendMessage({ name: 'count', value: count });
    });
Now with our code set, update the project .zip static resource in Lightning setup.
Navigate to Lightning developer console and add a new Lightning controller - just click on CONTROLLER
in the right-side panel.
This will create a new file named myAppController.js. Change the code inside to this:
-
myAppController.js
({
        // handle receiving messages from app
        handleMessage : function(component, message, helper) {
       	    const payload = message.getParams().payload;

            if (payload.name === 'count') {
                component.set('v.messageReceived', 'Cell count: ' + payload.value);
            }
	},
        // handle sending messages to app
        sendMessageToApp : function(component, event, helper) {
            const msg = {
                name: 'reset'
            };

            component.find("myEmbeddedApp").message(msg);
        }
})
We’ve defined 2 methods inside the controller file. handleMessage is handling communication from our app,
and sendMessageToApp is responsible for sending events to our app.
And lastly we update the myApp.cmp file:
-
myApp.cmp
<aura:component implements="force:appHostable">
    <aura:attribute access="private" name="messageReceived" type="String" default="Cell count: 0"/>

    <lightning:badge label="{!v.messageReceived}"/>

    <lightning:button label="Reset graph" onclick="{!c.sendMessageToRappid}"/>

    <br/>

    <lightning:container aura:id="myEmbeddedApp"
                         src="{!$Resource.testRappid + '/index.html'}"
                         onmessage="{!c.handleMessage}"/>
</aura:component>
Let’s break it down.
- The
aura:attributerepresents themessageReceivedvariable that we’ll use for our counter. - We’ve added a
lightning:buttonthat is connected to thesendMessageToAppfunction and alightning:badgewhich will show our current cell count. - We’ve also identified our container by
aura:idattribute so thesendMessageToAppmethod is able to send messages inside this particular container.
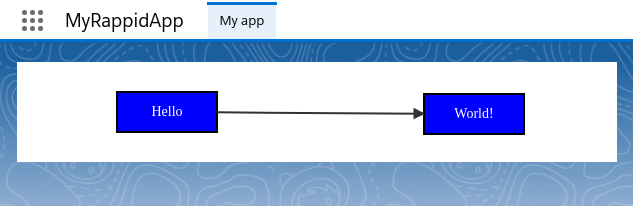
And we’re done! Now you should be able to see something like this: